Saturday, May 18, 2013

Laser Energy Cannon

This is a Laser Cannon I was working on as the main gun for the Sci-Fi Bunker. Made from thick (.125 I think) styrene and brass and styrene tubing. And no, this is not a Snub-nosed Laser.
 
 The side pod on this side is almost full-length.
 
 The left side pod is shorter to accommodate a gunner's chair in front.
 
 Adding the barrel and reciprocater. (Not sure what it does in this case, but sometimes you just have to go with the Cool Factor.)


 Do Laser Cannons need flash suppressors? Let's call it a 'concentrator.' It looks crooked in this shot, but it is not.
 
 
This is as far as I've gone. I do have the Gunner, so if time allows, I might go ahead and finish this.  Don

Friday, May 3, 2013

Better News

When last I posted, I was experiencing a lot of turmoil in my personal life, as well as suffering a hard drive crash. I am happy to say that both situations have been, or are being, resolved in a positive manner. I still expect to lose my house, but I should have some time before it happens. I am also more optimistic about surviving the ordeal, and also retaining most of my modeling tools, supplies, and projects. Also, the hard drive has been replaced, and I was able to salvage all of my pictures and documents. So, even though I will not be starting any new projects, and am packing away partially completed ones, I hope to post some things you haven't seen before. Give me a day or two, and I'll meet you back here.  Don

Monday, March 4, 2013

Bad News

I have to report that I am experiencing computer issues that may take some time to correct. That means that some projects, partially completed, will not be published as soon  as I had hoped and promised. I will try to get them up sometime, so check back here from time to time.   Don

Tuesday, February 26, 2013

An Explanation

It may seem that I have been all over the place lately, and there is a reason for that. I've had many interests over the years, and I've found it hard (impossible) to to stick with just one. Because of that, I've always had many projects in some state of completion. It's funny, but I can be completely consumed by one, spending days, weeks, or months immersed in research, planning, and building to suddenly have it go phhhttt in a second, and I'm off to something else. Until that one goes phhhttt too. I have learned to accept it, that I will always have semi-finished projects, some maybe never to complete. (Though I always hope to.)  That, however, is not the reason I am writing this. .............In about a month, I will probably be homeless. I  have been living under the cloud of it for some time, but its inevitability is drawing close. Up to now I have been trying to finish, or at least document my progress of as many as I can. I have reached the point where I doubt I will be able to do more modelling. I will now be boxing up as many of my tools, supplies, books, and projects as I can. I am hoping they may be stored for the future, but in all likelihood it will simply make the garbage man's work a little easier. I still have some things you haven't seen yet (here and on my railroad blog), so check back for further posts. I see from the stats there are quite a few of you out there, and I appreciate you looking in.  Don

Saturday, February 23, 2013

Battering Ram, Pt.5

I was asked by el zorro if I was going to have ladders, or some other way, to reach the upper platforms. I said I was planning on them, so let's get started.

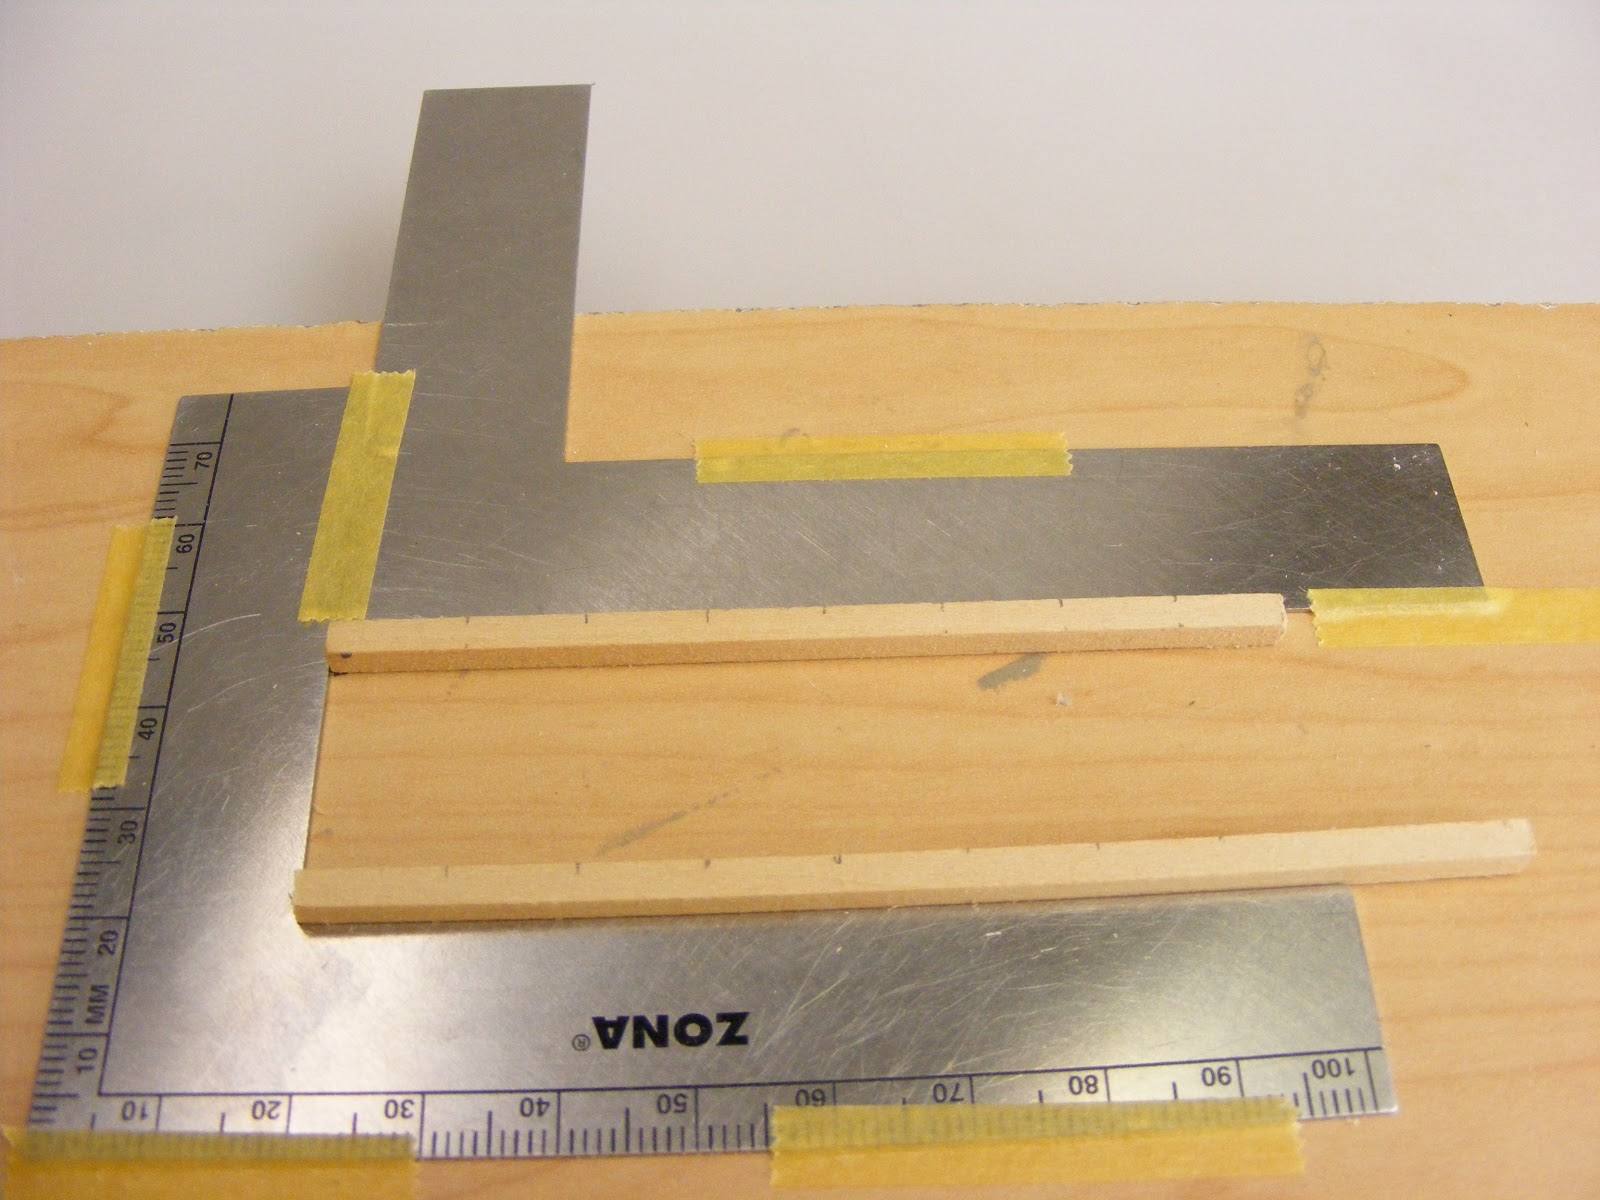
I actually have several plastic ladders from Games WorkShop WFB Siege Tower, but they weren't long enough. I also thought they were a bit narrow, so I gathered up some square wood stock. The uprights are 1/8" square, while the rungs are 1/16" toothpicks. I cut the uprights to fit the model, then played around with different arrangements until I found one I liked. I felt 20mm between the rails, and 10mm between the rungs looked best. To keep the uprights parallel, two angle squares were taped down, spaced for the 20mm width. You can see the faint pencil marks to locate the rungs, which are 30mm long, and were cut with the chopper I made.   I used carpenter's yellow glue to hold them on. I had planned on drilling each intersection to hold a small brass nail for extra strength, but I just couldn't see putting in another 30 minutes. I might poke a hole in each location, then stain it with a Sharpie, to simulate the nail holes.


The finished ladders. The two long ones attach to the rear of both sides, allowing access to the          upper rear platform, as well as both gangways. I doubled up the bottom rung, as the ladder hangs out in space. (You'll see in the next shot.) The short one goes from the right gangway to the upper           front platform. As you can plainly see, the pencil marks were merely......suggestions.                        
 
The ladders in place. They were glued directly to the ram's framework with the carpenter's glue.     


The more I thought about it, the more I liked the idea of metal cuffs on the Troll's wrists. Hammered out some more lead, then glued them on with CA.
 
You might wonder how I get these nice, shadow-less backgrounds. Here's how. Curved Plexiglas. I originally started with a piece of frosted plexi about 48" x 60". Using a propane torch, I heated the width, slowly softening it and allowing it to bend. I was left with a background that was 48" wide, 36" tall, and a 24" deep base. Even though it was already frosted, it still needed some work. The shooting surface was glossy and way too shiny. Fine grit sandpaper in the random orbit sander took care of the gloss, and also reduced worry about scratches. It was still too translucent. White spray paint on the complete under surface and curve, as well as a foot up the back took care of that, too. I made a movable table to hold it, with a light fixture above that held three 5000K, color-corrected fluorescent tubes. It was large, large enough for almost any model I might make. But in the end, it was too large, and took up too much space, and I dismantled it. The light fixture now is mounted above the workbench, giving nice, shadowless light. And careful maneuvering on the table saw turned one giant background into three. This small one is 8"wide x 9" high x 5" deep. The bottom one is now the largest at 24" wide x 22" high x 15" deep.
 
 
I did some more work on the Troll's poncho.


I'll try to get more done today.  Thanks for looking. Don

Friday, February 22, 2013

Battering Ram, Pt.4

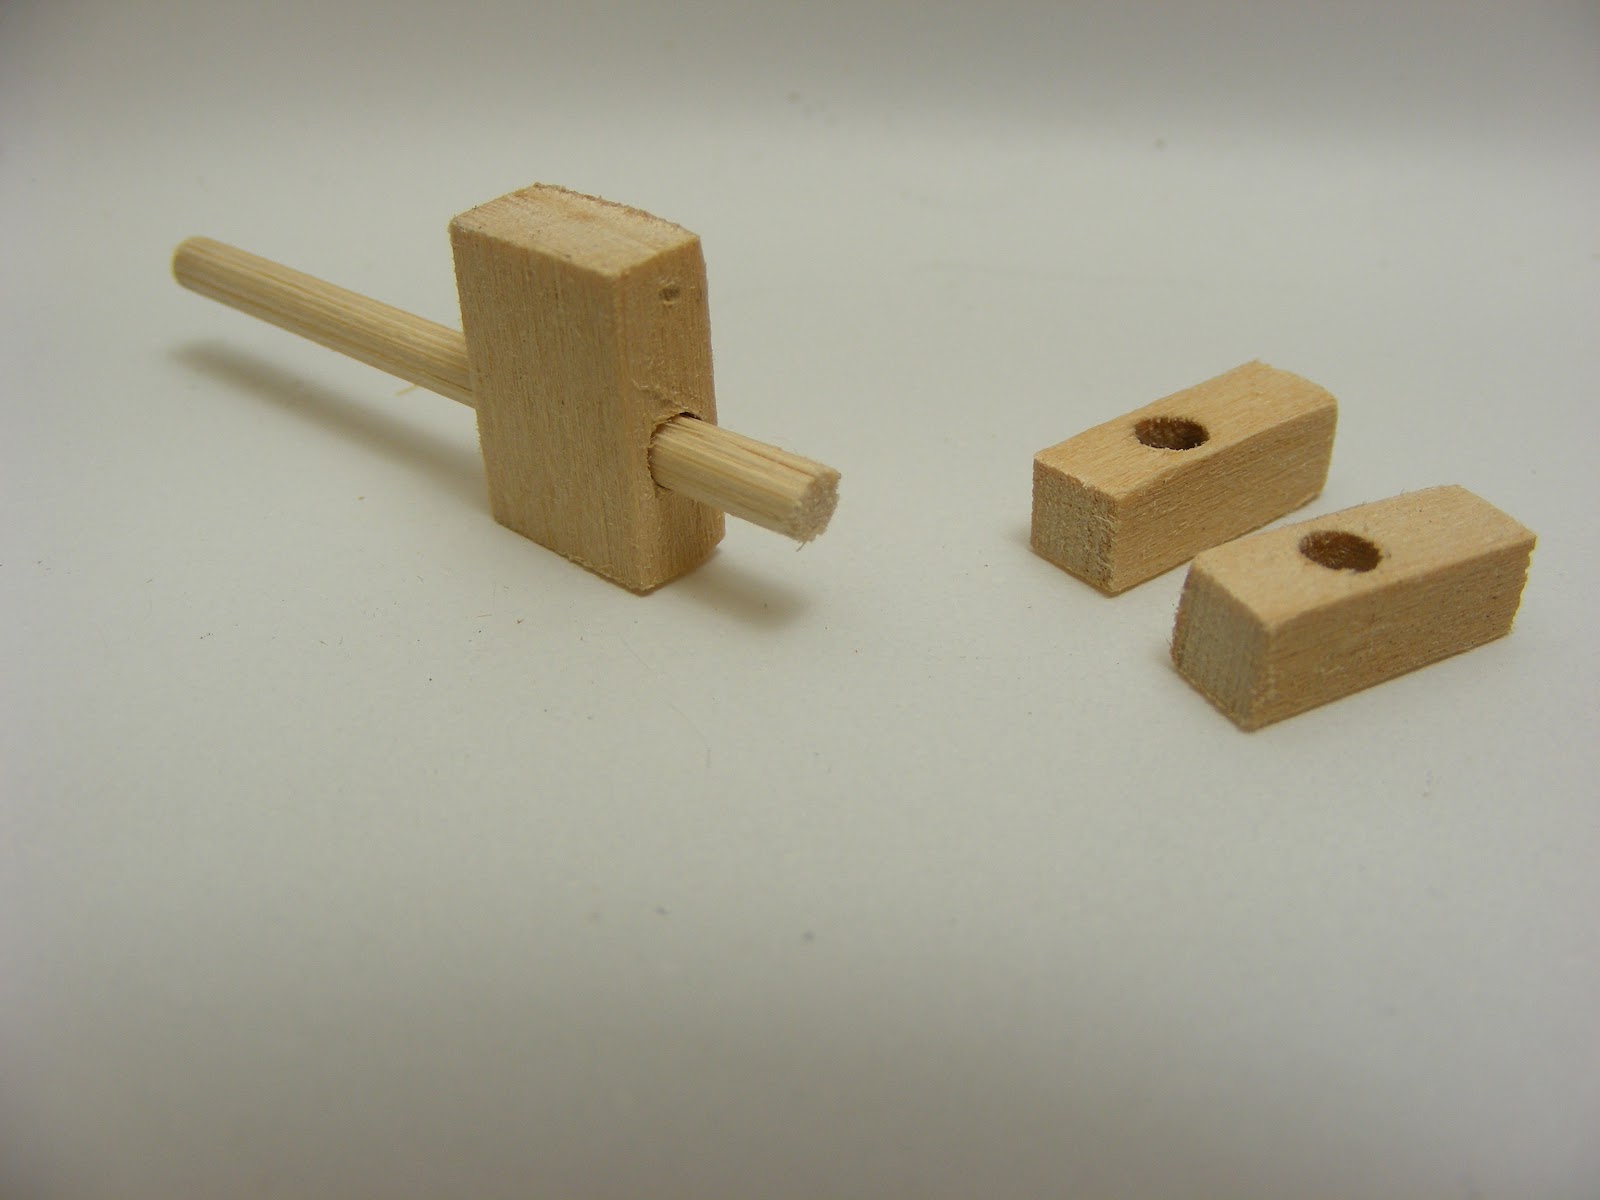
Will wonders never cease? I've actually done some more work on the ram today. I made the handles for the Troll to push the thing, then fit its hands to the handles. I began by taking the arms, removing the drum sticks, then drilling out the remainder of the sticks to fit a large bamboo skewer. Lastly, I cut off the locating pin at the shoulders. These arms are held on (and quite securely) solely by the two magnets.

 
I needed two blocks per side to hold the handles. To help maintain alignment, I drilled out the large block on the left, then split it in half, as on the right.
 
When I made the ram's frame work, I took care to make  the rear uprights  perfectly plumb. Now I had to make sure the skewers in the Troll's hands were also plumb. As originally assembled, they were not. I cut around the joint with a razor saw, so I could bend the wrist down. Luckily, when I first put the arms together, I strengthened the joint with a brass wire. I was able to carefully bend it down, without it actually separating from the rest of the arm. After using a square to achieve plumbness, I drizzled some thickened CA into the gap.
 
Some Squadron Green Putty finished filling in the rest of the gaps. I will sand away the excess tomorrow. (Or maybe fashion some wide bracelets.) If this model was to be used for just this purpose, I would have glued the arms directly to the body. But if you ever visited my other blog, you know I magnetized this Troll so all of its options were available. (See here) This leaves a rather noticeable joint line. To cover it I fashioned this leather (metal?) poncho. To make it, I used standard 1/4" and 1/8" paper punches to punch blanks out of my lead sheet, which were then flattened with a small ball peen hammer. They are glued to each other, but not to the Troll. (I still need to add some more.) This way it can be removed, allowing all the other options.

 
The blocks glued in place. (The skewers are loose-fit.) These joints are rather fragile, when they are fully cured, I will try to find a way to pin them for extra strength.
 
I've cut two skewers to size, and drilled them for brass pins, so they do not fall completely through


Since the shoulder locating pins are removed, the body can be easily pulled away from arms. (I suppose I could glue the arms directly to the handles, but you know me, I like options.)
 
I mentioned a single ballista for the front platform, but I'm also considering GW's Corsair Arbalesters as well.


From Games Workshop, this is how they look professionally painted.
 
That's it for now. If I get any farther along on this, I guess I need to make a gate for this to batter.  Don

Thursday, February 21, 2013

Battering Ram, Pt.3

Time to bring this project up-to-date. With all the framework complete, I could start on the various shooting platforms. These were made out of wooden coffee stirrers, which were thin with fine grain. (If you recall, I used them on the doors to the Mile Fort for the very same reason.) There was a small, front, top-level platform, shaped like the prow of a ship. Behind, separated by the pivot mechanism, was a larger, rectangular platform. Both had palisade walls. Below, over both sets of wheels were simple gangways without walls.


Some orcs, for scale.
 
 
Some detail of the gangways. I tried to make the planks as rough and irregular as possible.
 
I gave the upper platforms nice, semi-scalloped walls.
 
 
Which didn't take long to realize they didn't look very orc-like. ( Oh look honey, he's using Popsicle sticks.) So I attacked the individual planks with nipper, knife, and saw. "Death to rounded ends!" became my battle-cry. I also brutalized them with a wire brush. You can see the difference here, between front and back.
 
The effect of the wire brush becomes more evident in these shots.


Whoa, that front doesn't seem to offer much protection. No, it's lowered for the placement of some sort of ballista. Not the bright, cheery, brass ballistas I made previously, but some dark,  orcish, wooden brute.
 
That is as far as this project went. However, it is on my workbench right now, and I plan to make (at least) some progress on it. See you soon.

I'd appreciate any thoughts or criticisms on this, or any of my projects. Don